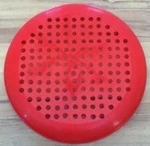
Frisbee Star Screens
(A “The Green Hatted Men”tutorial)
A star screen is simply a screen meant to sort round; sliced and cut stars according to size.
The reason you want to sort your stars according to size is to create stars that have approximately the same burn time.
Making Star Screens
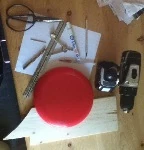
Everything needed to make star screens
Generally star screens are made by drilling a number of holes in a piece of metal; plastic; or wood, with plastic being the most common for obvious reasons.
Ok so things you will need to make star screens. All though many things will work I have chosen to use plain plastic Frisbees which I got from a dollar store for $1.25 CAD EACH.
· 1.) Drill
· 2.) A small drill bite like 1/8” (if the finished holes you wish to drill in the Frisbee are 3/8” or larger)
· 3.) A drill bite the size you want the finished holes to be
d 4.) Pen or pencil
5.) Compass
6.) A sheet of paper that is larger than the flat area of your frisbee
7.) Deburring bits, or a thin bladed knife
8.) Wood Board
9 9.) Water
10.) Paint marker
11.) Sizzers
12.) Ruler
Once you have your Frisbees you need to decide what sizes of holes you want, I went with 5/8” 1/2" 3/8” 19/64” and 1/4” holes, which means I need those sizes of drill bites as well as one smaller one.
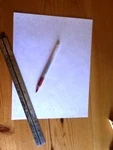
Now take a sheet of paper and using a ruler and
Marking the paper
pen/pencil to mark
· Every inch for 5/8” and 1/2" holes
· Every 3/4" for 3/8 inch holes
· Every 1/2" for 19/64” and 1/4" holes
· Every 3/8” or a little bigger for anything smaller than
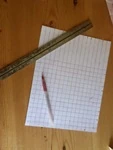
Finishing the grid work
1/4".
.
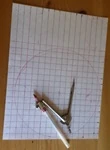
Then join the top marks to the bottom marks and the left hand marks to the right hand marks or vice versa to create a grid work.
.
.
Measuring the radius of the frisbee with a compass
.
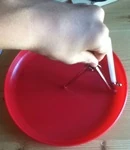
Next take the compass and set the pointer at the center of the Frisbee and the pen/pencil at the edge of the flat portion of the Frisbee.
Drawing a circle on the paper the same size as the frisbee
.
.
.
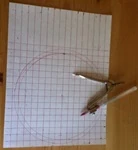
Then move the compass to the paper with the grid work drawn on it and draw a circle on top of the grid.
.
Then shorten the compass the same amount as the hole you intend on drilling into the Frisbee i.e. if you want 1/2" holes in your Frisbees then shorten the compass so
that it makes a circle with 1/2” shorter
radius then the first circle you drew, and draw this smaller circle inside the first circle so that the center of the second circle is in the same spot as the center of the first circle.

.
Then cut out the circle (that is at the outer line).
.
.
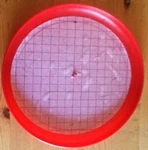
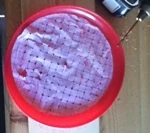
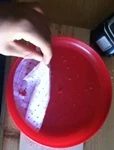
Wet the paper until it starts to become “see” through, and apply it (lines up) to the inside of the Frisbee, try to center it as well as you can. Wetting the paper will make it "stick" to the frisbee which will make drilling the holes much easier.
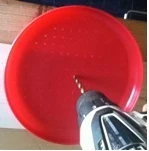
Then take your drill bit, remember if you want holes 3/8” or larger then use a small drill bite such as 1/8” first, so that you have a center ready for the larger drill bit which will make it easier to drill in exactly the right spot as well as keeping the paper from getting wound around the drill bit which is likely if the bit is quite large. Drill a hole at every point that the lines intersect that is inside or on the smaller circle.
Then peel off the paper and if necessary drill out the holes with a larger bit.
.
.
.
.
.
.
.
.
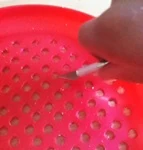
Then dry off the Frisbee, take the knife or deburring bits and remove the burros.
If the Frisbee cracks anywhere and it’s not a big crack ether glue it together or use a small torch/ lighter to weld it back together being careful not to melt the plastic too much.
Now just wash out the Frisbee, and mark the hole size on the side with the paint marker and you are finished!
If you have any questions or comments you can send the auther a message in two easy steps, first join Pyroguide forum and then send member Adam a personal message.
Written by Adam Macdonald
Written for www.pyrosource.com
All equipment supplied by
The Green Hatted Men